How to fold gift wrapping paper: perfect wrapping in 6 steps
Every step in gift wrapping matters, because over 60 percent of people remember their first impressions primarily from the outside . Whether you're giving a small piece of jewelry from Amsterdam or a grand surprise for a European wedding, the right wrapping makes all the difference. With practical tips, you'll learn how to professionally wrap any gift, from choosing the perfect paper to adding a surprising finishing touch.
Table of contents
- Step 1: Choose suitable wrapping paper and determine the size
- Step 2: Place the gift and fold the paper exactly around the object
- Step 3: Secure the paper securely with tape or glue
- Step 4: Form tight corners and ensure neat edges
- Step 5: Check the packaging for sturdiness and appearance
- Step 6: Finish with ribbon, bow or decoration for extra flair
Short Summary
| Key point | Explanation |
|---|---|
| 1. Choose suitable wrapping paper | Select paper that suits the size of the gift and the personality of the recipient. |
| 2. Ensure tight folds | Fold the wrapping paper carefully around the gift for a neat and symmetrical result. |
| 3. Secure neatly with tape | Use double-sided tape or sealing stickers for an invisible and professional finish. |
| 4. Create neat corners | Use the triangle method for sharp, neat corners that have a professional look. |
| 5. Finish with decoration | Add ribbon or decorative elements for a personal and more attractive gift presentation. |
Step 1: Choose suitable wrapping paper and determine the size
Choosing the right wrapping paper is the first crucial step in perfectly wrapping a gift. You want to select paper that not only suits the size of your gift but also reflects the recipient's mood and personality. Start by measuring your gift and then determine what size paper you need.
When selecting suitable wrapping paper, it's important to consider the material and thickness. Different types of wrapping paper have their own characteristics that influence the wrapping result. Thin paper is suitable for lightweight items like books or clothing, while sturdy kraft paper works better for heavier or angular gifts. Also consider the shape of your gift; a square box requires a different folding method than a round or irregular object.
A practical tip is to always use a little more paper than you think you'll need. This prevents frustration during wrapping and gives you some extra space to fold neatly. Make sure you have a sharp pair of scissors handy for a clean, straight cut along the edges of your wrapping paper.
Step 2: Place the gift and fold the paper snugly around the object
Now that you've chosen the right wrapping paper, the art of perfect wrapping begins by precisely positioning your gift. The goal is to create a tight and symmetrical package, with every fold smooth and precise.
When unfolding and placing your wrapping paper, it's important to follow these handy wrapping tips . Center the gift in the paper, leaving plenty of room on all sides. Make sure the paper is folded tightly around the object, without wrinkles or excess folds. Use your fingers to create sharp creases and press the edges firmly for a clean finish.
A pro tip is to slightly adjust the gift first so you can see exactly where the folds should be. Pay attention to the corners, as they ultimately determine how neat your package looks. Take your time and be patient; perfect wrapping requires precision and attention to detail.
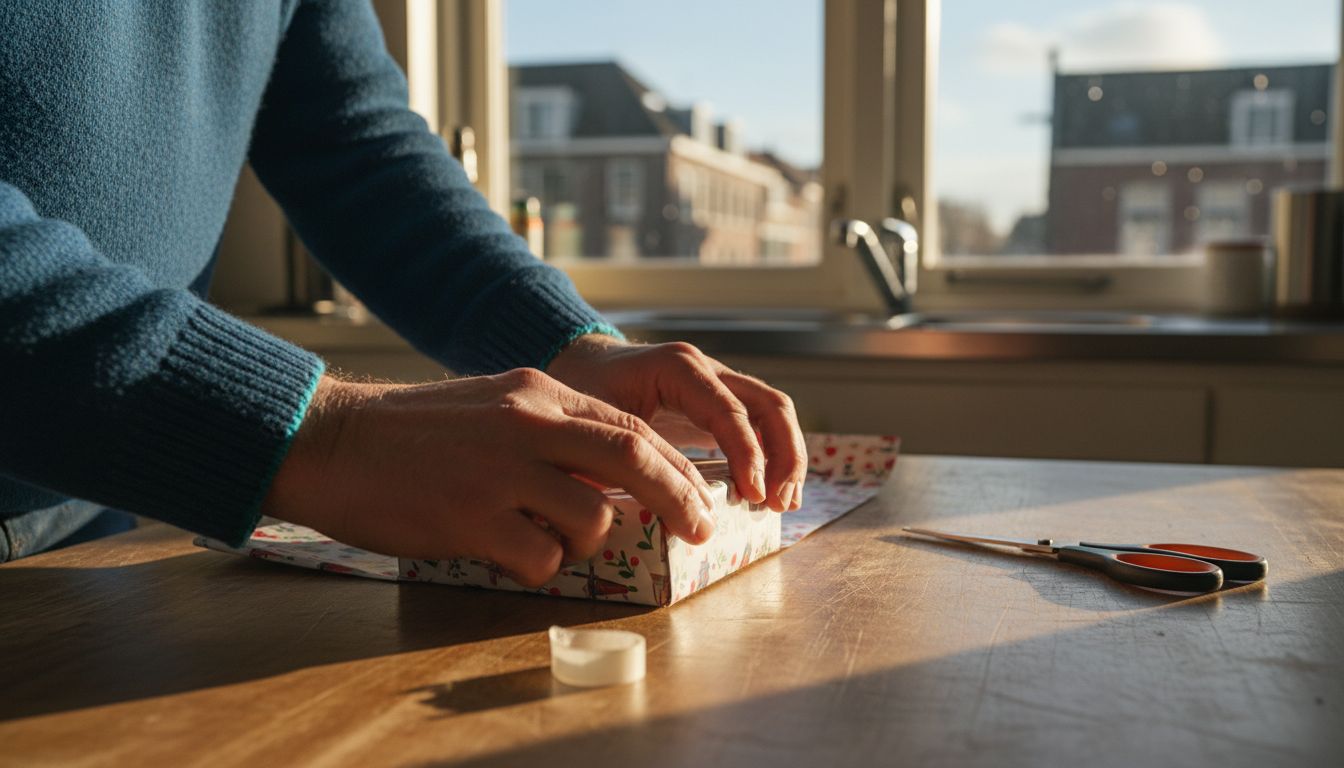
Step 3: Secure the paper firmly with tape or glue
After neatly folding the paper around your gift, the next crucial step is to securely and invisibly secure the edges. A neat seal determines the final, professional finish of your wrapped gift.
When attaching the paper, you can choose from several methods. Sealing stickers can provide a sleek and decorative solution for securing the edges of the paper. Ideally, use double-sided tape for an invisible bond or transparent tape that's barely noticeable. Make sure to apply the tape or stickers to the inside so they won't be visible from the outside of the package.
A pro tip is to prepare small pieces of tape before you start applying it. Cut them to size and keep them handy. Pay attention to the corners, as a neat application is most important there. Try to position the tape so that there are no bumps or wrinkles for a neat and smooth finish.
Step 4: Form tight corners and ensure neat edges
Creating neat, clean corners is a crucial skill when wrapping gifts. A perfectly folded corner makes the difference between sloppy and professional-looking packaging.
To create crisp corners, use the classic triangle method. Handy wrapping techniques can help with this. First, fold the sides firmly inward with sharp creases. Press the corners firmly to form a sharp point without any tears or bumps in the paper. Use your thumb and index finger to make the corners extra crisp and neatly fold away any excess paper.
A pro tip is to use a ruler or a blunt knife for extra-clean folds. Pay particular attention to the inside corners, where paper can easily wrinkle. Take your time carefully shaping each corner, checking that the edges are smooth and symmetrical.
Step 5: Check the packaging for sturdiness and appearance
After carefully wrapping, it's essential to critically examine the entire package. A perfectly wrapped gift exudes professionalism and care, creating a first impression that's just as important as the contents themselves.

When checking, pay attention to details such as business wrapping tips for a professional look . Look at the package from different angles to see if the folds are tight and if there are no loose edges or bumps. Check that the tape or adhesive strip is neatly applied and not sticking out. Also, check that the paper is smooth and wrinkle-free around the gift.
A final professional tip is to carefully lift and turn the gift. Check that all edges are securely fastened and that the paper doesn't shift. The goal is a neat and tidy package that looks neat and is sturdy enough to protect the gift.
Step 6: Finish with ribbon, bow or decoration for extra flair
The finishing touch to your gift makes it truly special. A beautiful ribbon or decoration elevates a simply wrapped gift to a work of art that the recipient will instantly appreciate.
Different types of ribbons can create a unique ambiance for your gift. Choose a ribbon that complements the color or style of your wrapping paper. Classic silk ribbons add a luxurious touch, while cotton or kraft ribbons have a rustic charm. Consider the width of the ribbon and tie it neatly around your package.
A creative tip is to add small decorative elements besides a ribbon, such as a dried flower, a small wooden charm, or a handwritten tag. These small details make your gift personal and unforgettable. The most important thing is that your decoration enhances the gift's ambiance and showcases the creativity and care you put into wrapping it.
Make your gifts perfect with the right materials from Kadopapier.net
The article "How to Fold Gift Wrap: Perfect Wrapping in 6 Steps" clearly demonstrates that choosing the right wrapping paper and folding it accurately are essential for a professional and polished look. Many people struggle to find sturdy and attractive paper that's also easy to fold and secure without wrinkles or bubbles. Furthermore, the process requires quality accessories like tape, sealing stickers, and ribbons to give every package that finishing touch.
At Kadopapier.net, we understand the importance of using the best materials to ensure your wrapped gifts make an impression and stay secure. Discover our extensive range of sleek wrapping paper, various ribbons, and practical sealing stickers that will help you with every step of the wrapping process. Start creating stylish and elegant gifts today that will truly touch the recipient. Browse our selection at Kadopapier.net and get the tools you need to take your gift wrapping to the next level.
Frequently Asked Questions
What are the first steps for wrapping a gift?
Start by choosing suitable wrapping paper and measuring the size of your gift. Make sure the paper suits the recipient's size and style.
How do I make neat corners when wrapping gift paper?
Use the classic triangle method to create sharp corners. Fold the sides in firmly and press the corners together for a sharp, wrinkle-free point.
Which tape should you use to attach wrapping paper?
For a concealed mounting, use double-sided tape or transparent tape. Make sure to apply the tape on the inside for a neat finish.
How can I check the sturdiness of my wrapped gift?
Carefully lift the gift and turn it to check that all edges are securely fastened. Check that the paper doesn't shift or that there are no loose edges visible.
What are some decorative tips for finishing a wrapped gift?
Add a pretty ribbon or decorative elements like a dried flower or a handwritten tag. These accents personalize your gift and enhance its appeal.
Recommendation
- Ways to Use Tissue Paper – Kadopapier.net
- Wrapping with tissue paper: Wrap your gifts in style – Kadopapier.net
- How to fold tissue paper into beautiful gifts – Kadopapier.net
- Neatly Wrapping a Gift: Helpful Tips and Techniques – Kadopapier.net
- Difference Between Biodegradable & Recyclable: Complete Guide – Earth Saver Straws
- Business Card Design Tutorial: Professional and Unique